The Student Notes page allows you to take notes for individual students who are assigned to your team. These can be accessed through the Teams page.
Select ‘My Teams’ in the navigation menu. On the My Teams page, find the team with the students you want to take notes for. Click the three dots next to the team name and select ‘View Students.’

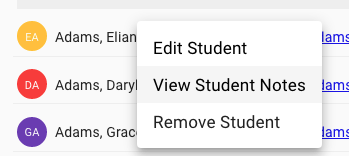
This will take you to the Student Groups page. On this page, find the student you want to take notes for and select the three dots next to their name. From the option there, choose ‘View Students Notes’.

This will take you to the Student Notes page.

On this page you will see the student’s name and graduation year, and a list of all current notes about the student. Each note will be listed with the note title, the date it was posted, and who it was posted by. As you can see in the image above, there are currently no notes for this student. Let’s take a look at how to create a new note.
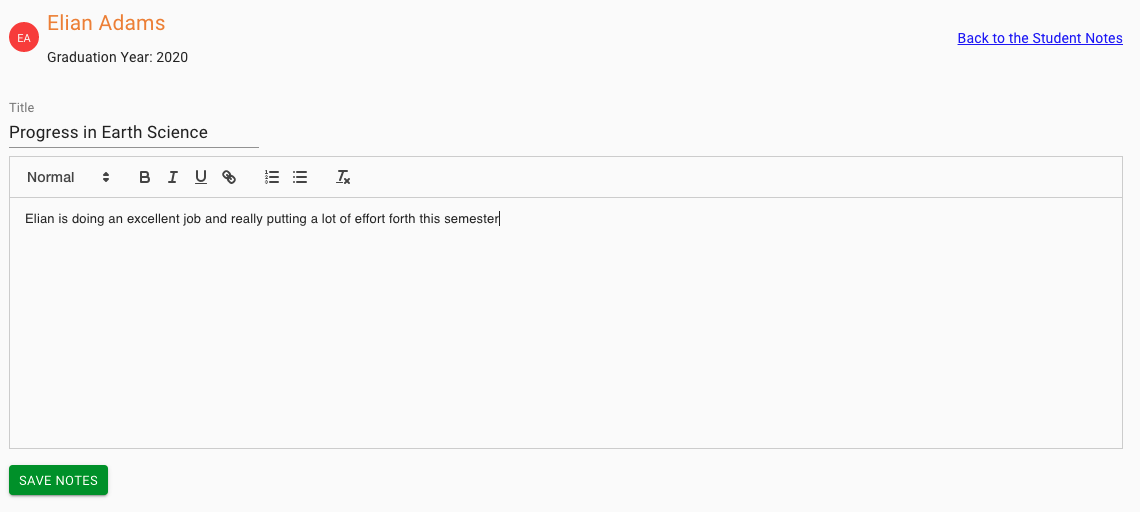
Select the green ‘Create New Note’ button. On this page, add a title for your note, and then begin writing notes for the student in the box provided. When you are finished, click ‘Save Notes.’ This will take you back to the Student Notes page where you will see your newly added note. If you wish to return to the Student Notes page without saving, select ‘Back to the Student Notes’ in the top right of the screen.

On the Student Notes page, now we can see this note in the list. If you’d like to delete the note, select the ‘Delete Note’ button. You will need to confirm this action if you want to permanently delete the note. Each time you add a student note, all members of your team will receive an email notification that the note was made.
Our next article will discuss Student Comments.

