Agendas help meetings stay on task, and they help all team members to know what to expect and be prepared for during the meeting.
To create an agenda for a meeting, first go to the Meetings page by selecting ‘Meetings’ in the navigation. Next to the Meeting select ‘Actions’ then ‘Agenda’.

The Agenda page allows you to add, edit or delete agenda items for meetings.
To create the agenda, you will need to begin adding agenda items. Select the ‘Add Agenda Item’ at the top right of the screen.

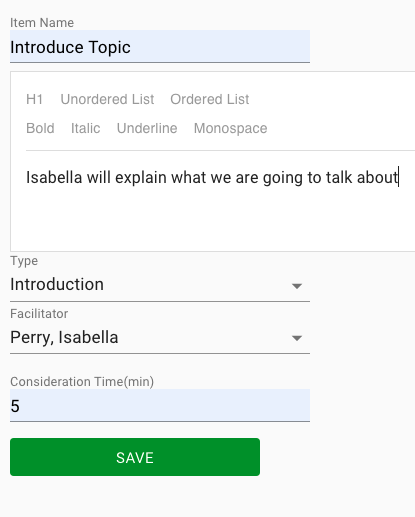
This will redirect you to a page where you can create your agenda item. This page will require you to provide a name for the item, an item type (Introduction, Discussion, Presentation, etc.), facilitator and time, in minutes, that will be allotted this item. Additionally you can provide a description for this item but that is not required in order to save the agenda item.

To save your agenda item, select the ‘Save’ button. This will take you back to the Agenda page where you will see your newly added item.
As you add items to the agenda, they will appear in a list on this page. You can sort the order of the items by clicking the grid icon to the left of their name and dragging and dropping them.

Changes to the order of agenda items are saved automatically.
Once your Agenda is created, how can you make it available to your team so that they know what the upcoming meeting will cover? You can post the agenda, and that will send an email to all members of the team. Select the ‘Post Agenda’ button next to the ‘Add Agenda Item’ button. This button will only be visible if you have not already posted the agenda.

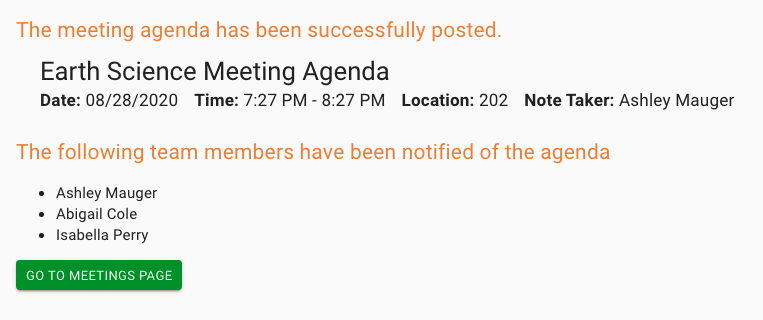
You will see this confirmation when you select ‘Post Agenda.’ To go back to the Meetings page, select the green ‘Go to Meetings Page’ button.
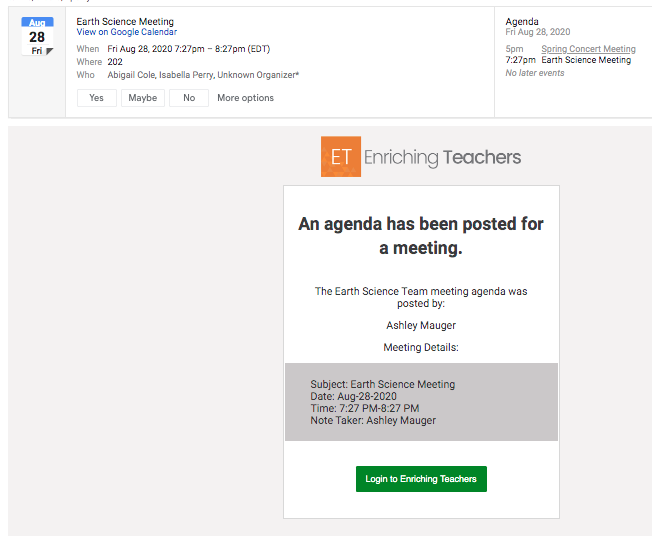
As mentioned, each member of the team assigned to this meeting will receive an email when the agenda is posted. In your inbox, it will look something like this.

When you or any team member opens the email, it will look something like this. They will be able to see the details of the meeting, and if they select ‘Login to Enriching Teachers’ they will be able to view the agenda for the meeting easily.

That is how you can create a meeting agenda. The next section will discuss the Admin Settings pages, which help you as an Admin manage various features of the application.

